Accessing Chrome Notification Settings
Google Chrome is one of the most widely used web browsers in the world, with millions of users accessing it on a daily basis. One of the most convenient features of Google Chrome is its ability to send notifications from websites, apps, and extensions. However, these notifications can sometimes be overwhelming or distracting. To manage these notifications, Chrome has a notification settings menu that users can access.
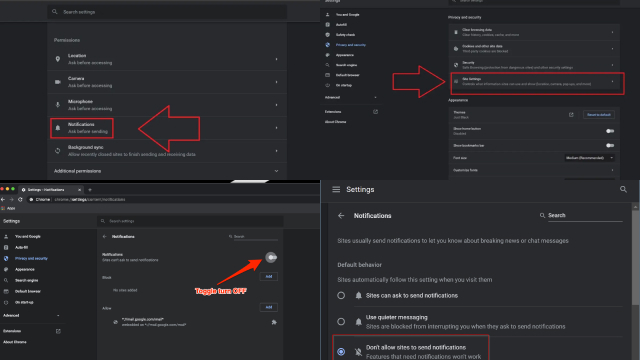
To access the Chrome notification settings, users need to open Chrome and click on the three-dot icon in the top right corner of the browser. From there, users can select “Settings” from the drop-down menu. In the Settings menu, users should scroll down and select “Privacy and security” and then “Site settings”. Finally, users can click on “Notifications” to access the Chrome notification settings.

In the notification settings menu, users can customize their notification preferences for each website they have visited. Users can choose to allow or block notifications for individual websites, or even customize the behavior of notifications for specific websites. For instance, users can choose to receive notifications silently, or disable notifications altogether.
In addition to controlling website notification permissions, Chrome also allows users to manage system notification permissions. Users can control how Chrome handles system notifications for different types of events, such as incoming calls or new messages.
By accessing the Chrome notification settings, users can take control of their notification preferences and manage distractions while using the browser.
Controlling Website Notification Permissions
Website notifications can be helpful for receiving important updates and reminders, but they can also be annoying and distracting. Fortunately, Google Chrome provides users with the ability to control website notification permissions.
To control website notification permissions in Chrome, users should first access the Chrome notification settings by clicking on the three-dot icon in the top right corner of the browser, selecting “Settings,” and then “Privacy and security,” and finally “Site settings.” From there, users can select “Notifications” to view a list of websites they have visited and their notification permissions.
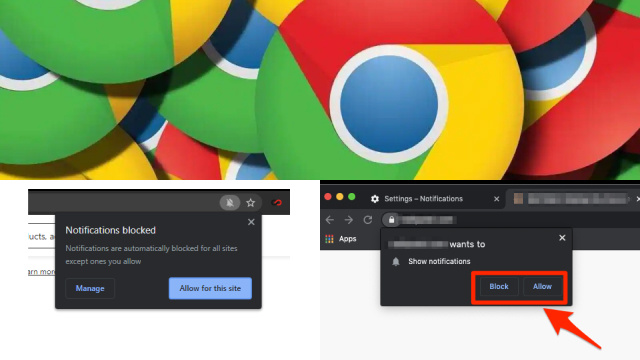
Users can choose to allow or block notifications for individual websites by toggling the switch next to each website name. Chrome also allows users to customize notification behavior for specific websites by clicking on the website name and selecting “Edit” next to the notification settings. From there, users can choose to receive notifications silently or disable them altogether.
By controlling website notification permissions, users can reduce distractions and improve their browsing experience.
Managing System Notification Permissions
System notifications are an important part of any device, providing users with updates on incoming calls, messages, and other system events. However, excessive or poorly managed system notifications can be frustrating and distracting. Google Chrome provides users with the ability to manage system notification permissions and control how Chrome handles system notifications for different events.
To manage system notification permissions in Chrome, users should access the Chrome notification settings by clicking on the three-dot icon in the top right corner of the browser, selecting “Settings,” and then “Privacy and security,” and finally “Site settings.” From there, users can select “Notifications” and scroll down to the “Advanced” section.

In the Advanced section, users can choose how Chrome handles system notifications for different events, such as incoming calls or new messages. Users can choose to show or hide notifications, play a sound, or vibrate the device. Users can also choose to block specific apps from sending system notifications altogether.
By managing system notification permissions, users can reduce distractions and stay focused on the most important notifications on their device.
Customizing Notification Settings for Specific Websites
Google Chrome allows users to customize notification settings for specific websites to ensure a more personalized browsing experience. To customize notification settings for specific websites, users should access the Chrome notification settings by clicking on the three-dot icon in the top right corner of the browser, selecting “Settings,” and then “Privacy and security,” and finally “Site settings.” From there, users can select “Notifications” and view a list of websites they have visited.
Users can then click on the website name and select “Edit” next to the notification settings. This allows users to choose whether to allow or block notifications for the website, as well as customize the behavior of notifications. Users can choose to receive notifications silently or disable them altogether, depending on their preferences.
By customizing notification settings for specific websites, users can ensure they receive only the notifications they want and reduce distractions while browsing.
Turning Off Chrome Notifications Completely
While notifications can be helpful for staying up-to-date with important events and updates, they can also be distracting and overwhelming. If users want to turn off all Chrome notifications completely, they can do so easily.
To turn off Chrome notifications completely, users should access the Chrome notification settings by clicking on the three-dot icon in the top right corner of the browser, selecting “Settings,” and then “Privacy and security,” and finally “Site settings.” From there, users can select “Notifications” and toggle the switch next to “Sites can ask to send notifications” to the off position.

By turning off Chrome notifications completely, users can reduce distractions and focus on their work without worrying about being interrupted by notifications. It’s important to note that turning off notifications completely will also prevent users from receiving important updates from certain websites or services, so it should be used with caution.
Enabling Quiet Notification Requests
Google Chrome offers a feature that allows users to enable quiet notification requests, reducing the interruption caused by notification pop-ups. With this feature enabled, notifications will appear quietly in the Chrome notification center, allowing users to view them at their convenience.
To enable quiet notification requests in Chrome, users should access the Chrome notification settings by clicking on the three-dot icon in the top right corner of the browser, selecting “Settings,” and then “Privacy and security,” and finally “Site settings.” From there, users can select “Notifications” and toggle the switch next to “Use quieter messaging (blocks notification prompts from interrupting you)” to the on position.
By enabling quiet notification requests, users can reduce distractions caused by notification pop-ups and view notifications at their convenience, without being interrupted. This feature can be especially useful for users who receive frequent notifications from various websites and services.
Reviewing Blocked Notifications and Permissions
Google Chrome provides users with the ability to review blocked notifications and permissions for specific websites. This allows users to easily manage their notification settings and ensure they only receive notifications from the websites they choose.
To review blocked notifications and permissions in Chrome, users should access the Chrome notification settings by clicking on the three-dot icon in the top right corner of the browser, selecting “Settings,” and then “Privacy and security,” and finally “Site settings.” From there, users can select “Notifications” and view a list of websites they have visited.

Users can then click on the website name to view its notification permissions. If notifications are blocked, users can choose to unblock them by clicking on the toggle switch next to “Blocked.” Users can also choose to customize notification settings for each website, allowing them to receive notifications only when desired.
By reviewing blocked notifications and permissions, users can manage their notification settings and ensure they only receive notifications from the websites they choose. This can help reduce distractions and improve the browsing experience.