Introduction to manual VPN configuration on Windows 10
A Virtual Private Network (VPN) is a secure connection that helps you to keep your online activities private. Windows 10 includes a built-in VPN client that can be used to manually set up a VPN connection.
To configure a manual VPN connection on Windows 10, you need to gather information such as the server name or address, the VPN type, and the login credentials. Once you have all the necessary information, you can set up a manual VPN connection by following these steps:
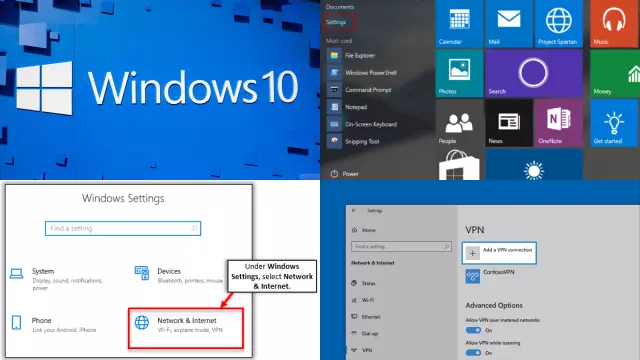
- Click the Windows Start button and select Settings.
- Click on Network & Internet and then select VPN from the list of options.
- Click on Add a VPN connection.
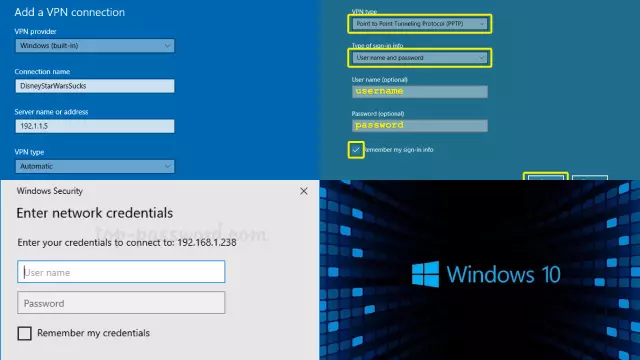
- Fill in the information you gathered earlier and click on Save.
- Connect to the VPN by clicking on the newly created connection.
With these simple steps, you can easily configure a manual VPN connection on Windows 10. This will help you to keep your online activities private and secure.
Setting up a new VPN connection on Windows 10
Setting up a new VPN connection on Windows 10 is a straightforward process. VPNs are designed to secure your internet connection and protect your online privacy. Here are the steps to set up a new VPN connection on Windows 10:
- Go to the Windows Start menu and select Settings.
- In Settings, click on Network & Internet, and then click on VPN.
- Click on Add a VPN connection.
- Fill in the necessary information, such as the server name or address, VPN type, and login credentials.
- After entering the information, click on Save.
- To connect to the VPN, click on the newly created connection, and then click on Connect.
With these steps, you can easily set up a new VPN connection on Windows 10. Having a VPN will encrypt your internet traffic and protect your online privacy and security. Additionally, using a VPN can also allow you to bypass internet restrictions and access geo-restricted content.
Understanding the required information for manual VPN setup
Before you can set up a manual VPN connection on your Windows 10 device, you will need to gather certain information. Understanding the required information for manual VPN setup is crucial for a successful VPN connection. Here is what you will need:
- Server name or address: This is the address of the VPN server that you want to connect to.
- VPN type: Different VPN providers use different VPN protocols, such as PPTP, L2TP, SSTP, IKEv2, or OpenVPN. You need to know the type of VPN protocol your provider uses.
- Login credentials: To connect to the VPN, you will need to enter your username and password. Some VPN providers also require a pre-shared key or certificate.
With this information, you will be able to set up a manual VPN connection on your Windows 10 device. Keep in mind that the exact information required may vary depending on your VPN provider.
If you are not sure what information you need, consult your VPN provider’s support documentation. Having the required information will ensure that you are able to connect to the VPN successfully and enjoy a secure and private internet connection.
Inputting server and login information for your VPN
When setting up a manual VPN connection on your Windows 10 device, you will need to enter the server and login information provided by your VPN provider. This information is crucial for establishing a successful VPN connection. Here is what you need to know about inputting this information:
- Server name or address: This is the address of the VPN server that you want to connect to. Make sure to enter it correctly to ensure a successful connection.
- Login credentials: To connect to the VPN, you will need to enter your username and password. Some VPN providers also require a pre-shared key or certificate. Make sure to keep this information secure and keep it confidential.
After entering the required information, you can save the VPN connection and connect to it at any time. To connect to the VPN, simply click on the newly created connection and click on Connect. With the correct server and login information, you will be able to establish a secure and private VPN connection on your Windows 10 device.
Configuring security and network settings for the VPN connection
Once you have entered the server and login information for your VPN connection, you can configure the security and network settings for your VPN connection on your Windows 10 device. Here is what you need to know:
- Security settings: Depending on the VPN type, you may be able to choose between different security options, such as encryption levels and authentication methods. Make sure to select the security settings recommended by your VPN provider.
- Network settings: You may be able to configure network settings such as the DNS servers used by the VPN connection and the routing of network traffic through the VPN. Make sure to configure these settings carefully to ensure that your VPN connection is secure and reliable.
By configuring the security and network settings correctly, you can ensure that your VPN connection is secure and operates optimally. If you are not sure what security and network settings to choose, consult your VPN provider’s support documentation. With the correct security and network settings, you will be able to enjoy a secure and private internet connection with your VPN.
Testing and saving the VPN connection on Window
Once you have configured the security and network settings for your VPN connection on your Windows 10 device, you can test the connection and save it for future use. Here are the steps to follow:
- Test the VPN connection: To test the VPN connection, simply click on the newly created VPN connection and click on Connect. If the connection is successful, you should see a message indicating that you are connected to the VPN.
- Save the VPN connection: After you have tested the VPN connection and confirmed that it is working, you can save it for future use. To do this, simply click on the VPN connection and click on Disconnect. The VPN connection will now be saved and can be easily accessed from the Windows Start menu in the future.
By testing and saving the VPN connection, you can ensure that you are able to quickly and easily connect to the VPN whenever you need it. With a successful VPN connection, you can enjoy a secure and private internet connection on your Windows 10 device.
Troubleshooting common issues with manual VPN configuration on Windows 10
Manual VPN configuration on Windows 10 can sometimes encounter issues, but there are steps you can take to troubleshoot these problems and get your VPN connection working again. Here are some common issues and how to resolve them:
- Incorrect login credentials: If your VPN connection fails due to incorrect login credentials, make sure that you have entered your username and password correctly.
- Incorrect server information: If the VPN connection fails due to incorrect server information, make sure that you have entered the correct server name or address.
- Security or network configuration issues: If your VPN connection fails due to security or network configuration issues, try changing the security or network settings and test the connection again.
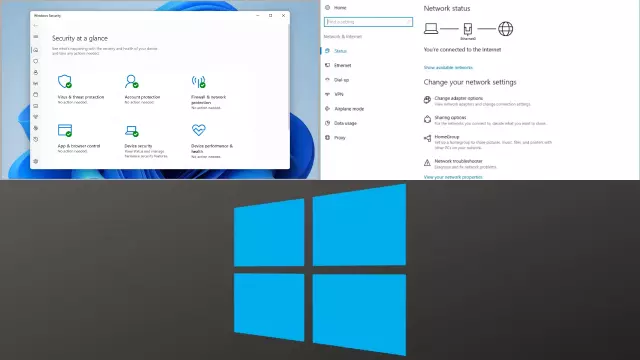
- Firewall or antivirus software: Your firewall or antivirus software may be blocking the VPN connection. Temporarily disable these programs and test the VPN connection again.
By troubleshooting common issues with manual VPN configuration on Windows 10, you can quickly get your VPN connection working again and enjoy a secure and private internet connection. If you continue to encounter problems, consult your VPN provider’s support documentation for additional help and guidance.
Enhancing VPN Security: Best Practices for Manual Configuration on Windows 10
In an era of increasing digital threats and privacy concerns, the utilization of a Virtual Private Network (VPN) for enhanced security and privacy has become paramount. When manually configuring a VPN on Windows 10, it’s crucial to implement best practices to ensure your data remains safeguarded. Here are some recommendations for enhancing VPN security:
- Choose a Reliable VPN Provider: Start by selecting a reputable VPN service that offers strong encryption and a strict no-logs policy.
- Enable Strong Encryption: Use the highest level of encryption available, such as AES-256, to protect your data from prying eyes.
- Regularly Update Your VPN Software: Ensure that your VPN client is always up to date to patch any security vulnerabilities.
- Use Strong, Unique Passwords: For your VPN account and server logins, create strong, unique passwords to prevent unauthorized access.
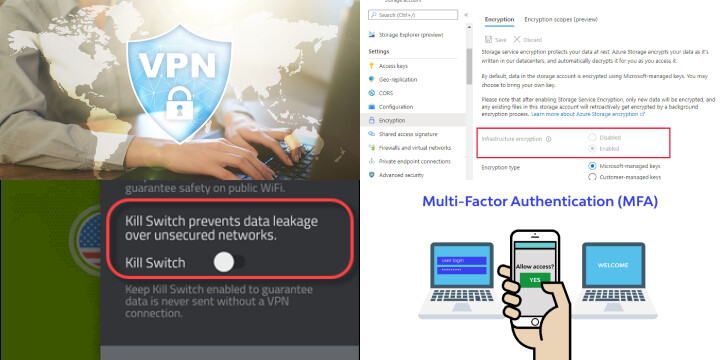
- Enable Kill Switch: Activate the VPN kill switch feature to disconnect your internet if the VPN connection drops, preventing data leakage.
- Multi-Factor Authentication (MFA): Whenever possible, enable MFA for an additional layer of security.
- Regularly Monitor Your Connection: Keep an eye on your VPN connection to detect any irregularities or potential security breaches.
- Choose Secure Protocols: Opt for secure VPN protocols like OpenVPN or IKEv2, and avoid less secure options.
- Regularly Review Privacy Policies: Stay informed about your VPN provider’s privacy policy to ensure they uphold their commitment to user privacy.
By following these best practices, you can significantly enhance the security and privacy of your manually configured VPN on Windows 10, ensuring your online activities remain protected from potential threats and eavesdropping.
Conclusion: The benefits of manual VPN configuration on Windows 10
Manual VPN configuration on Windows 10 provides several benefits that can enhance your online security and privacy. With manual VPN configuration, you have full control over the security and network settings for your VPN connection.
This means that you can choose the security and network settings that best suit your needs, ensuring that your VPN connection is secure and reliable.
In addition, manual VPN configuration allows you to connect to any VPN server of your choice, regardless of whether your VPN provider offers a dedicated app for Windows 10. This can be especially useful if you need to connect to a specific VPN server for a specific purpose, such as accessing a restricted website or streaming content from a specific region.
In conclusion, manual VPN configuration on Windows 10 is a powerful tool for enhancing your online security and privacy. By configuring your VPN connection manually, you can ensure that your VPN connection is secure, reliable, and tailored to your specific needs. With a secure VPN connection, you can enjoy a private and secure internet experience on your Windows 10 device.


