Introduction: Why Run Android on Your Computer?
Android is the most popular operating system for smartphones and tablets, and for good reason. It offers a user-friendly interface, access to millions of apps, and a variety of customization options. However, there may be times when you want to run Android on your computer. Perhaps you want to test an app you’re developing or you simply prefer the Android operating system to Windows or macOS.
Running Android on your computer can be accomplished through several methods, each with its own advantages and disadvantages. In this article, we’ll explore some of the most popular methods for running Android on your computer, from using an emulator to installing Android-x86 on your machine. With these methods, you can enjoy all the benefits of Android on your computer, opening up a world of possibilities for work and play.
Method 1: Using an Android Emulator
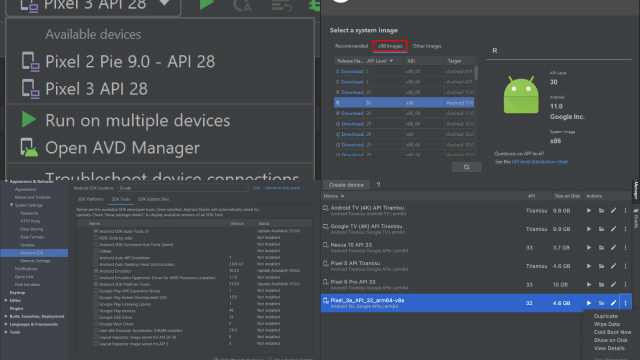
An Android emulator is software that allows you to run Android on your computer as if it were a smartphone or tablet. This method is popular among developers who need to test their apps or games on a variety of devices without owning each one.
There are several Android emulators available, with the most popular being BlueStacks, NoxPlayer, and Genymotion. These emulators simulate the Android environment, allowing you to install and run apps just as you would on an actual Android device.
While using an Android emulator is a convenient way to run Android on your computer, it does have its limitations. The performance may not be as smooth as on a physical device, and some apps may not work properly. Additionally, some emulators may require a powerful computer to run smoothly. Nonetheless, an Android emulator is a great option for those who want to experience Android on their computer without the need for additional hardware.
Method 2: Running Android on a Virtual Machine
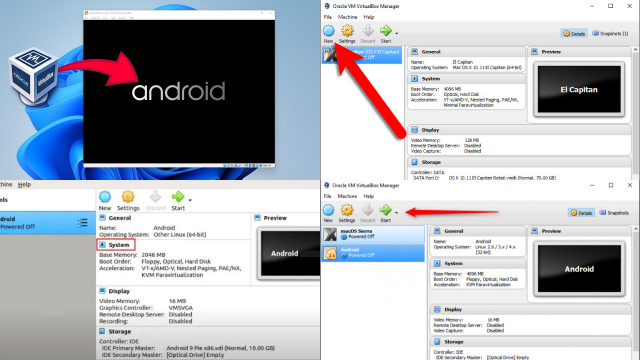
Running Android on a virtual machine is another way to experience Android on your computer. A virtual machine is an emulation of a computer system within a host operating system, which means you can run Android on your computer without having to replace your existing operating system.
To run Android on a virtual machine, you’ll need virtualization software like VirtualBox or VMware. Once you have installed the virtualization software, you can download an Android ISO image and install it on the virtual machine, just like you would with a physical device.
One advantage of running Android on a virtual machine is that it allows you to run multiple instances of Android on a single computer. This can be useful for testing apps or games across different versions of Android or for running multiple apps simultaneously.
However, running Android on a virtual machine may require a powerful computer with a lot of RAM and processing power, and the performance may not be as smooth as on a physical device. Nonetheless, it’s a convenient way to run Android on your computer without having to install it natively.
Method 3: Installing Android-x86 on Your Computer
Android-x86 is a project that ports the Android operating system to x86-based hardware, which means it can be installed on most computers. Installing Android-x86 on your computer allows you to run Android natively, giving you a faster and smoother experience than using an emulator or a virtual machine.
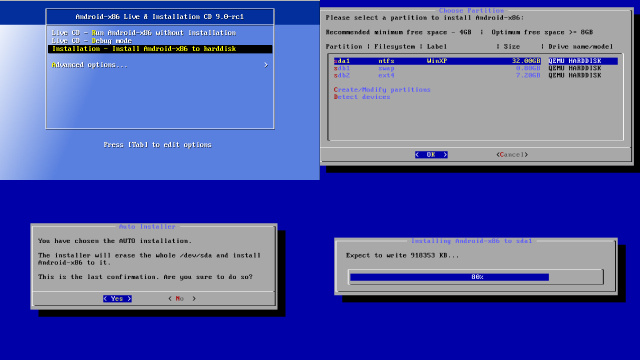
To install Android-x86 on your computer, you’ll need to download the ISO image from the Android-x86 website and create a bootable USB drive or DVD. Once you have booted from the USB drive or DVD, you can install Android-x86 just like you would any other operating system.
One advantage of installing Android-x86 is that you can dual-boot your computer, which means you can choose to boot into either Android-x86 or your existing operating system at startup. This allows you to switch between Android and your primary operating system whenever you like.
However, installing Android-x86 may require some technical expertise, and not all hardware is compatible. Nonetheless, if you’re comfortable with tinkering with your computer, installing Android-x86 can be a great way to run Android natively on your computer.
Method 4: Using a Dual-Boot Setup with Android and Windows
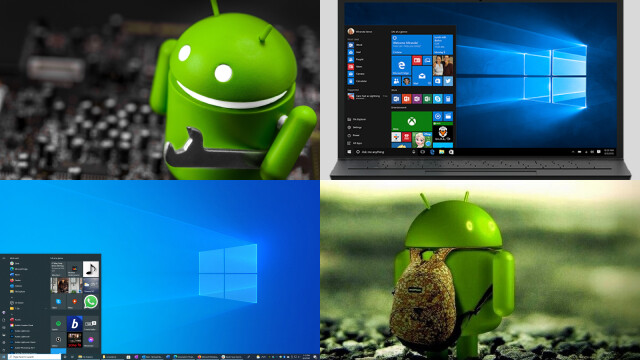
A dual-boot setup allows you to run two different operating systems on the same computer, and it’s another way to run Android on your computer. With a dual-boot setup, you can choose to boot into either Windows or Android at startup.
To set up a dual-boot setup with Android and Windows, you’ll need to create a separate partition on your hard drive for Android. Once you’ve created the partition, you can download an Android ISO image and install it on the partition, just like you would with a physical device.
One advantage of a dual-boot setup is that you get the full power and performance of running Android natively on your computer, without the performance overhead of an emulator or virtual machine. Additionally, you can switch between Android and Windows whenever you like, without having to reboot your computer.
However, setting up a dual-boot system requires some technical expertise, and it’s important to back up your data before making any changes to your hard drive. Nonetheless, a dual-boot setup can be a great way to run Android on your computer, especially if you need to use Android apps or games that require high performance.
Method 5: Installing Android on a Raspberry Pi
If you have a Raspberry Pi, you can install Android on it and use it as a mini-computer or media center. Installing Android on a Raspberry Pi is a bit more complicated than using an emulator or virtual machine, but it can be a fun project for hobbyists or tinkerers.
There are several ways to install Android on a Raspberry Pi, but one popular method is to use an image file from the official Raspberry Pi website. Once you have downloaded the image file, you can flash it to an SD card using a tool like Etcher. After that, simply insert the SD card into your Raspberry Pi and power it on.
One advantage of using a Raspberry Pi to run Android is that it’s a low-cost solution, and you can easily customize it to suit your needs. Additionally, the Raspberry Pi is a great platform for experimenting with Android development.
However, keep in mind that the Raspberry Pi has limited processing power and memory compared to a full-sized computer, so performance may be slower. Nonetheless, installing Android on a Raspberry Pi can be a fun and educational project for anyone interested in tinkering with technology.
Conclusion: Enjoy Android on Your Computer
In conclusion, there are several ways to run Android on your computer, ranging from using an emulator or virtual machine to installing it on a separate partition or device. Each method has its own advantages and disadvantages, and the best one for you depends on your specific needs and preferences.
Using an Android emulator is a simple and convenient way to run Android apps on your computer, but it may not provide the full Android experience. Running Android on a virtual machine can provide a more complete experience, but it may require more resources from your computer.
Installing Android-x86 or using a dual-boot setup can provide a more powerful and versatile Android experience, but it requires some technical know-how and may require making changes to your computer’s configuration.
And for those who want to experiment with Android on a smaller scale, installing it on a Raspberry Pi can be a fun and educational project.
Whichever method you choose, running Android on your computer can be a great way to enjoy your favorite apps and games on a larger screen, or to test and develop Android apps. With a little bit of effort and experimentation, you can enjoy the best of both worlds and have Android running smoothly on your computer.


